Best budget dash cams with night vision are usually the sweet spot for drivers who want usable nighttime footage without paying flagship prices, but the tricky part is knowing which “night vision” claims actually hold up on real roads.
Most people buy a dash cam after a close call, a parking-lot hit, or an insurance headache, and then realize too late that cheap sensors can smear details at night, headlights blow out the image, and license plates turn into white rectangles.
This guide focuses on what matters for night driving in the U.S., what to expect at different price points, and how to choose a camera that fits your car and your routine, commuting, rideshare, or mostly parked on the street.
What “night vision” really means on budget dash cams
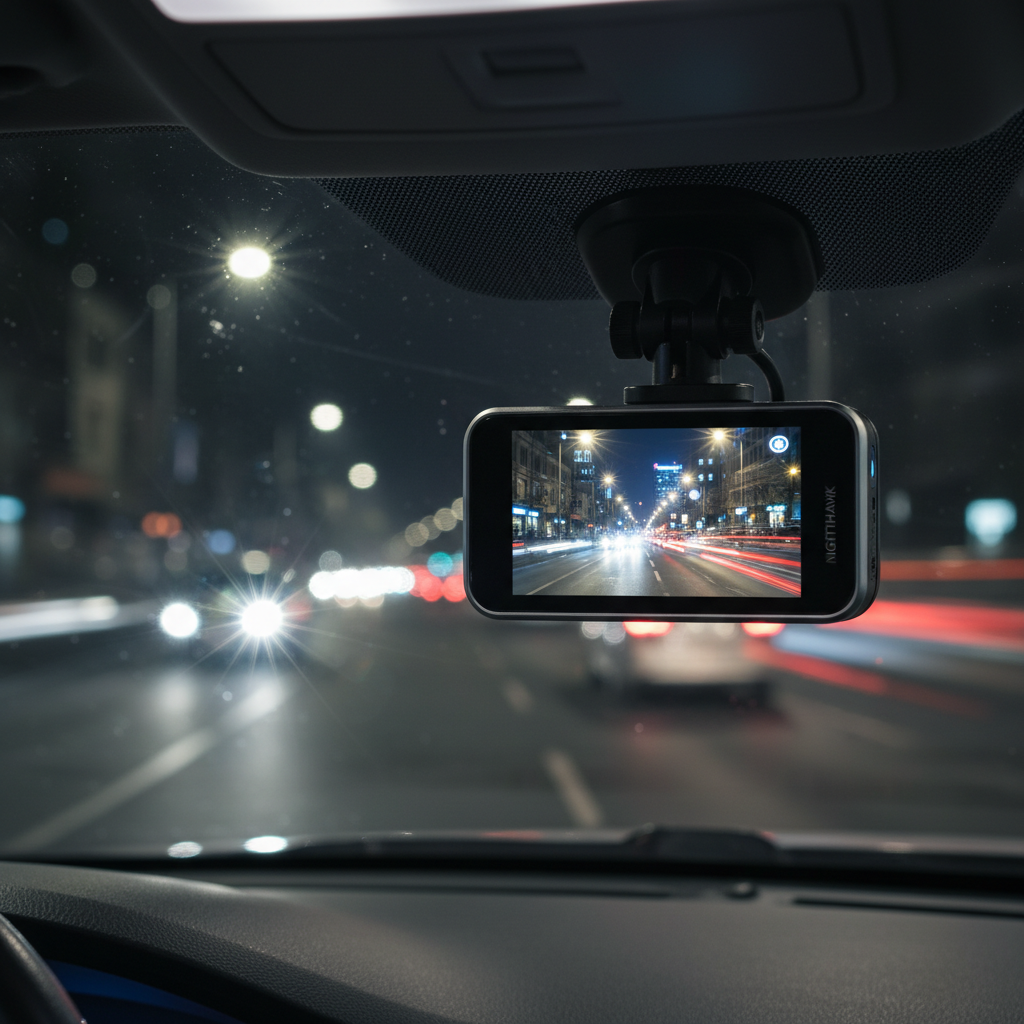
In dash cams, “night vision” often means the camera can expose a usable image in low light, not that it sees like military night-vision goggles. Many consumer models rely on a decent image sensor, wide aperture lens, and software tuning to reduce noise while keeping detail.
Infrared LEDs exist on some cams, but they typically help inside the cabin, not through glass to the road ahead. For front-facing road capture, you’re usually better off with strong low-light performance and good headlight handling.
- Low-light detail: how much texture you keep on dark roads without turning the image into grain.
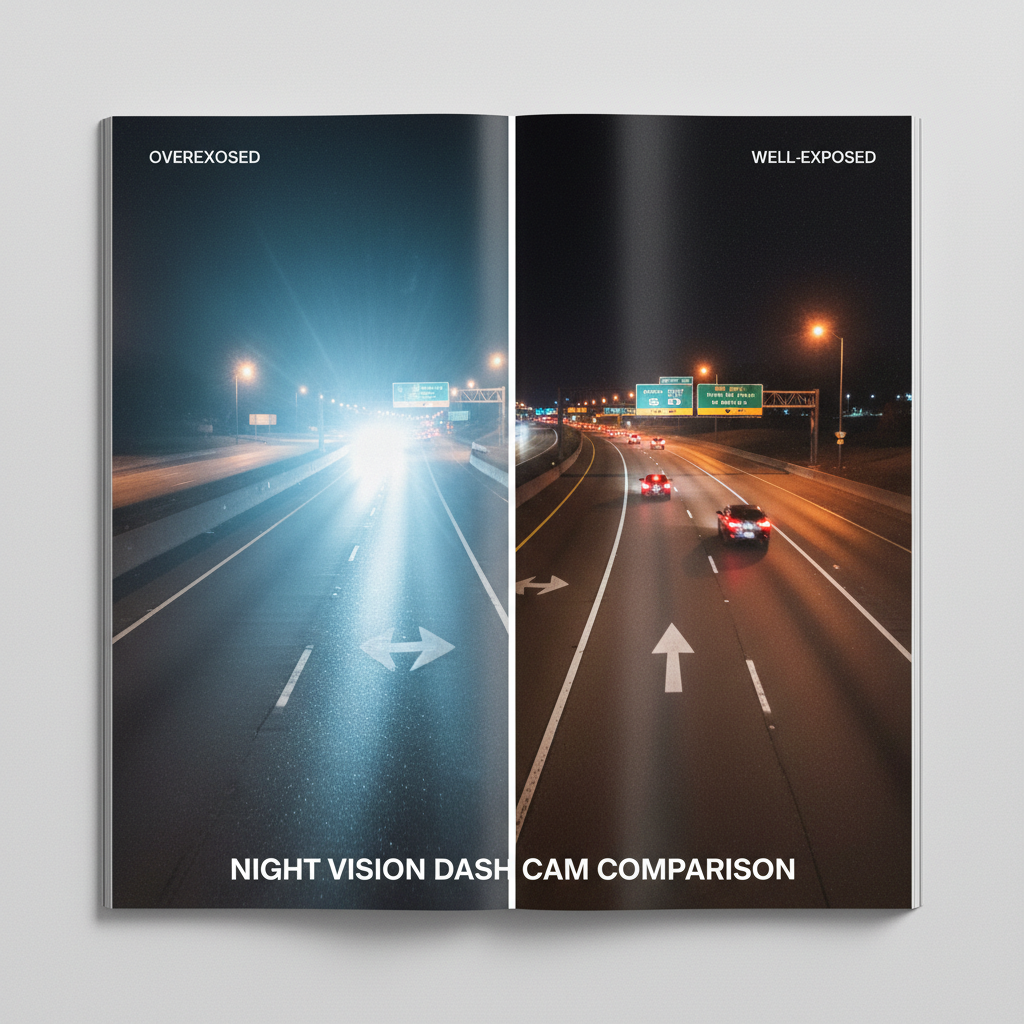
- Headlight control: whether bright points blow out the scene or stay contained.
- Motion at night: if the camera keeps sharp edges while you’re moving, not just when stopped.
- Plate readability: realistic expectations matter, plates are hardest when cars move fast and lights reflect.
According to NHTSA, visibility and proper lighting are major factors in traffic safety, which is a good reminder that nighttime footage is inherently challenging, even for higher-end cameras.
Quick checklist: are you the right buyer for a budget night-vision dash cam?
If you mainly drive during the day on well-lit roads, almost any modern camera can look “fine.” Budget buyers who truly benefit from better night capture usually fit one or more of these situations.
- You commute before sunrise or after dark, especially on suburban roads with fewer streetlights.
- You park outside and want incident capture with parking mode (this often needs extra hardware).
- You drive in rain or snow where glare gets worse and cheap sensors struggle.
- You do rideshare and want either dual-channel coverage or at least clear front footage at night.
If your top goal is reading license plates from far away at highway speeds, set expectations: that’s one of the hardest tasks for any dash cam, and “best budget dash cams with night vision” can help, but won’t perform miracles in every scenario.
Key specs that actually improve night footage (without overspending)
Spec sheets can be noisy, so it helps to focus on a few items that tend to correlate with better night results in real driving. Not every brand lists everything clearly, and marketing terms vary, but these are the levers that matter.
Sensor and lens basics
- Sensor quality: look for reputable sensor lines when listed; otherwise rely on credible reviews showing true night clips.
- Wide aperture lens: a lower f-number can help in low light, though it’s not the only factor.
- HDR/WDR: helps balance headlights and dark areas, especially at intersections.
Resolution vs clarity
4K sounds like the answer, but at night a weaker sensor pushing higher resolution can look worse than a strong 1440p setup. If you must choose, prioritize cleaner exposure and highlight control over raw pixel count.
Bitrate, compression, and frame rate
- Higher bitrate usually preserves detail in shadows and moving scenes, assuming storage can handle it.
- 30 fps is common; 60 fps can reduce motion blur, but only if the camera maintains exposure without getting too dark.
Heat and reliability
In many U.S. states, a dash cam lives through hot summers. Capacitors (instead of lithium batteries) often hold up better in heat, though model-by-model reliability still matters.
2026 buying guide table: what to expect by budget tier
Prices fluctuate a lot around sales, so think in ranges. The point is to set realistic expectations for night performance and features that may affect total cost.
| Budget tier (USD) | Night driving expectation | Common features | Trade-offs to watch |
|---|---|---|---|
| $40–$70 | Usable footage on lit streets, glare can be rough | 1080p, basic WDR, screen | More noise, weaker plates, shorter lifespan variance |
| $70–$120 | Better exposure control, cleaner shadows | 1440p, stronger HDR/WDR, Wi‑Fi app on some | Apps can be finicky, rear cam often extra |
| $120–$180 | Noticeably better highlight control, more consistent night results | 2K/4K options, GPS in some kits, buffered parking mode on some | Total cost rises with hardwire kit + SD card |
If your priority is night clarity on a budget, the middle tier often delivers the most noticeable step up before you pay for premium extras.
How to choose the right setup for your driving scenario
The “best” pick depends less on the label and more on where you drive, how you park, and how much effort you’re willing to put into installation and maintenance.
Mostly highway at night
- Favor strong HDR/WDR and stable mounting, vibration makes night blur worse.
- A slightly narrower field of view can sometimes keep details less stretched, but too narrow can miss side context.
City night driving with lots of headlights
- Prioritize highlight control and clean exposure, blown highlights kill detail fast.
- Look for real-world sample clips in reviews, not just still photos.
Street parking and hit-and-run risk
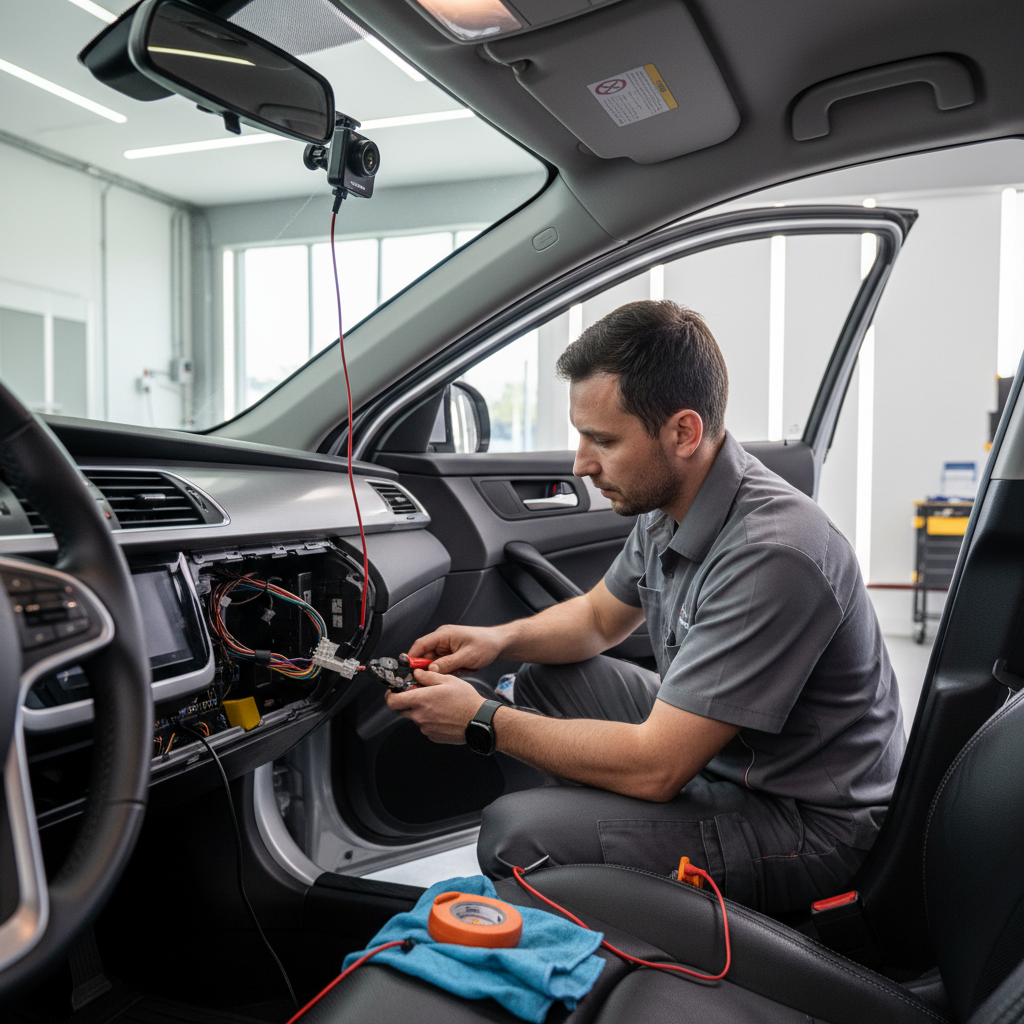
- Parking mode matters more than “night vision” marketing, but it often requires a hardwire kit.
- Buffered parking mode is a plus because it can capture a few seconds before impact, when supported.
Rideshare or frequent passengers
- Consider dual-channel, front + cabin, if you need interior documentation.
- IR cabin LEDs can help inside, just don’t confuse that with road night capture.
Practical setup tips that improve night footage immediately
Even the best budget dash cams with night vision can look disappointing if setup is off. These fixes are boring, but they’re the difference between “proof” and “muddy clip.”
- Clean your windshield inside and out, haze causes halos around lights.
- Mount near the rearview mirror to reduce reflections and keep the view centered.
- Level the horizon, too much hood in frame wastes pixels and darkens the road.
- Turn off cabin screen at night if it reflects in the glass; many cams have screen-saver modes.
- Use a quality microSD rated for continuous recording; formatting on schedule helps stability.
If your camera allows it, test HDR/WDR toggles on a familiar route, some models look better with it on, some can introduce ghosting, especially with fast motion.
Common mistakes buyers make (and how to avoid them)
Most “bad night vision” complaints come from a handful of predictable mismatches between expectations, hardware, and setup.
- Overvaluing resolution: 4K on paper does not guarantee cleaner night video.
- Skipping total-cost math: add a hardwire kit, a high-endurance card, and maybe a rear cam, the “budget” price can change.
- Ignoring return window testing: you want a night drive test, rain test, and a headlight-glare test while you can still return it.
- Relying on Wi‑Fi only: apps can be slow, a quick SD card pull is still the fastest way to grab clips.
Also worth saying plainly, if you need footage for an incident, pull and back up the file quickly. Loop recording can overwrite older clips, and impacts do not always trigger “event” protection the way you expect.
According to FTC guidance on advertising, marketing claims can be broad, so treat “night vision” as a feature to verify with real sample footage, not a guarantee.
Conclusion: a realistic way to shop for night-vision value in 2026
Buying on a budget works when you aim for consistent nighttime exposure, solid glare control, and a setup that matches your parking needs. If you do one thing this week, pick two or three candidates, watch real night clips, then test your top choice on your own roads before the return period ends.
If you want a simple decision rule, choose the best camera you can afford from the mid-tier range, add a high-endurance microSD card, and spend ten minutes on mounting and windshield cleaning, those three moves usually beat chasing specs.
Key takeaways
- “Night vision” usually means low-light tuning, not true infrared road viewing.
- HDR/WDR and sensor quality tend to matter more than headline resolution at night.
- Install and settings can make or break nighttime clarity.
- Parking mode often requires extra hardware, plan for it upfront.
FAQ
What are the best budget dash cams with night vision for dark rural roads?
Look for models reviewers show performing on unlit roads, not just city streets. Strong low-light exposure and controlled noise usually matter more than 4K, and stable mounting reduces blur on rough pavement.
Do infrared dash cams help you see outside the car at night?
Usually no, IR LEDs are more useful for cabin-facing cameras because windshield glass and distance limit what IR can illuminate on the road. For forward road footage, sensor performance and HDR/WDR tend to do more.
Is 4K necessary for reading license plates at night?
Not always. Plates are affected by motion blur, glare, angle, and reflective material, so a cleaner 1440p image can outperform a noisy 4K feed. Your local lighting and speeds make a big difference.
Should I turn HDR/WDR on for night driving?
In many cases yes, because it helps balance headlights and shadows, but it can introduce artifacts on some cameras. It’s worth testing both settings on the same route and choosing the cleaner result.
What microSD card should I use for a budget dash cam?
Choose a reputable high-endurance microSD designed for continuous recording, and match capacity to your resolution and commute length. Reformatting periodically can reduce file errors, though exact intervals vary by brand.
Does parking mode drain the car battery?
It can. Hardwire kits often include a low-voltage cutoff to reduce battery risk, but results vary by vehicle and battery condition. If you’re unsure, it’s smart to ask an installer or automotive electrician.
Where should I mount my dash cam for the best night footage?
High on the windshield near the rearview mirror usually minimizes reflections and keeps the view centered. Avoid placing it where tinted bands, stickers, or dirty areas soften the image.
If you’re trying to pick between a few budget models and want a more “no guesswork” path, it can help to shortlist based on real night sample clips, then confirm your total setup cost, SD card, mount position, and whether you truly need parking mode before you commit.